How to Create a Wireframe
Wireframes are a wonderful way to plan the user interface for web pages and apps. User Experience (UX) designers and students can use them in their design process. Designers use wireframe tools or pencil and paper and plan out the backgrounds, navigation, home button, and much more.
You don’t need to be a web designer or student to use wireframes. You could have a blog that you want to plan out; the project does not have to be coded from scratch. Anyone using a website builder can benefit from the wireframe process. Your use case doesn’t even have to be web-related. Any person that needs to visualize a project or concept can take the skills learned here and apply them elsewhere.
Wireframes are about planning and visualizing your project. They are used in User Experience Design because they help you plan for the user or customer’s experience. The wireframe you create can be tested and researched multiple times before you actually create the project. That way, by the time you’re ready to create the project or product, you’ve worked out kinks in the design.
User Experience Design
Website UX design aims to put the customer at the center of brainstorming, design, and product of a webpage. The concept can be expanded outside of this to any user-focused project. The process includes research, collecting feedback, and workshopping ideas for creating a simple, easy-to-use, easy-to-understand final product.
Before wireframing, UX designers need extensive research about the success of certain products and the accessibility standards needed.
Product research allows UX experts to learn from their competitors’ mistakes based on feedback and research. If your competitor makes something that doesn’t work, you need to know why. It could be their colors, or their 10 images slowing down browser loading time and increasing bounce rate.
Accessibility standards could include a read-aloud function in an app or taking into account how too many words, symbols, and colors on a page can overstimulate and confuse users. Beyond adjusting for disability, these are often poor design choices, with oversaturation being the common mistake.
Certain kinds of vision impairments and color blindness mean you need to think carefully before using three different shades of purple, or any neon colors (incredibly bright colors are a definite no). Vision or hearing disabilities aren’t the only elements to watch out for, some on the Autism spectrum will have trouble when a web page is overstimulating.
Inclusivity does not sacrifice artistic freedom, in fact, in UX design it improves it. The goal is to have a design where the majority of people can find the subscribe button without getting distracted, confused, or even annoyed. The worst kind of user interface (UI) design upsets people. Simple and clean is a good rule of thumb. The best UX designers ensure each component of their work is essential and serves a purpose.
The Process of Creating a Wireframe
The wireframe process can be long and incredibly in-depth; it can also take a couple of minutes. The fidelity of your design, or how detailed it is, depends on your project and who you’re working with. If you need to incorporate research then your design will likely be a high-fidelity mockup Simpler blog pages can often be accomplished with a low-fidelity wireframe.
The components you add and how you represent them depend on your use case. You can account for the header, navigation, and footer. The design elements in the body are up for grabs. You don’t have to account for any one thing, in any one way. There are only the rules you create.
People will need a key to understand those rules, like if x boxes are images or text, or if a button is a circle. Make sure not to break your own rules because teammates won’t be able to understand you. Consistency is ideal for a wireframe template.
Successful UX designers often highlight integral aspects you want on the wireframe. An icon or logo should be at the top of the page, and you can note on your list “icon – top.” Images can be anywhere and they can be also hyperlinked, so it will be good to note “image + hyperlink – body.”
Text placement is very important especially for a mobile app. Trial and experimentation can be the best way to achieve solid results here. The text should not be too long or endless and will benefit by being broken up with images. The image can float to the left, right, or be a clean break in-between paragraphs.
You can sketch out different views, using squiggly lines, or boxes that say txt. With a wireframe tool, you can generate or copy and paste lorem ipsum text as a malleable placeholder. Testing out your views is the biggest part of creating a wireframe.
You may find that once you’re building your UI elements in real-time, the original layout doesn’t work. Taking the time to have more than one layout can help create better pages or apps.
You can create prototypes or mockups of your projects with a wireframe tool. The tool allows you to change it as you’re building the actual design. An interactive prototype will help with letting coworkers, managers, and clients know any major changes without having to share your code.
For those who want to build a project or idea with a wireframe, you’ll need the key that explains your shapes, and a list of all unique details. Along with research, and light sketching.
Seeing examples can be the best way to learn for many who are new to wireframes. Googling wireframes will bring up a dizzying mashup of templates, and real projects. Below are some successful examples and explanations of what makes them work.
Wireframe Examples
Less ornate templates are easier to start with because anyone can copy one and then build up from there. Here’s an example from Figma (a major wireframe and design tool), of a low fidelity frame.
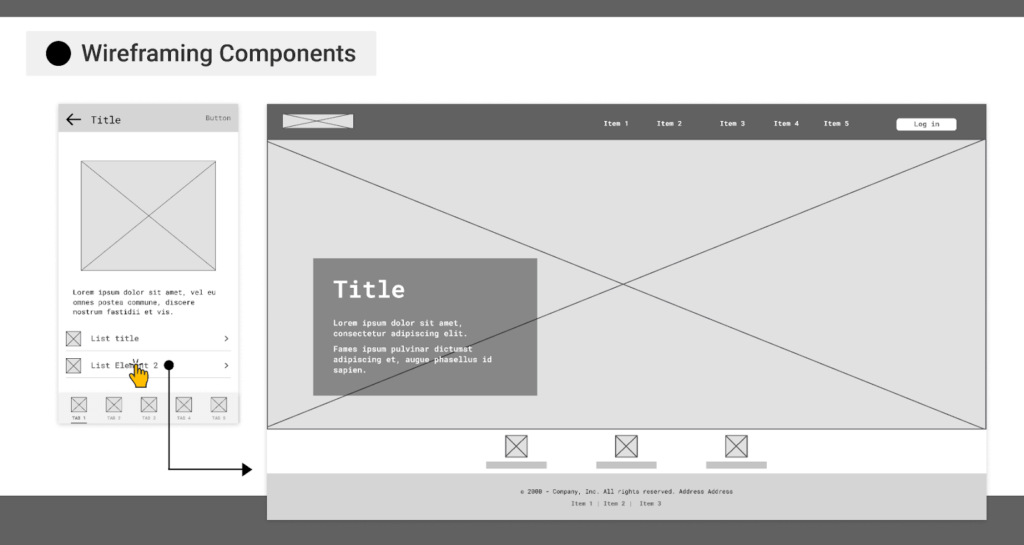
In this example, there’s a header with a navbar, footer, and list items. The large x box is the body, which can also be an image if this is a landing page. They use placeholder text to see how a text box looks over their image. They added a mobile view version that shows how their image, text, and list will move. Add a key of what elements you represent and you’re good to go with this one.
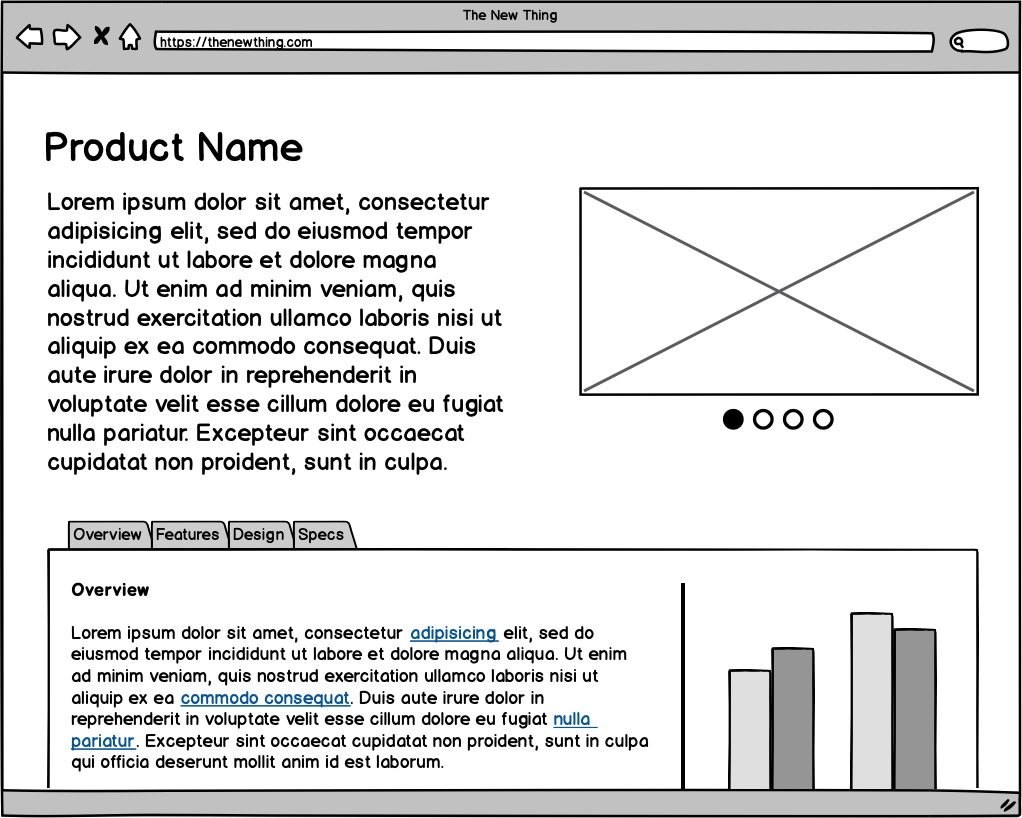
Below is an example from another major wireframe tool, Balsamiq. This example gets a little more detailed, writing out what the sections are, but maintaining a simple flow. The choice of font could just be for the wireframe, but it’s great to show your font choices with your layout.
Developers and students can leave the colors, patterns, logos, fonts for their design guide. A design guide includes all design elements for clients and coworkers to review. Those working on projects or apps can definitely find these useful to create with their wireframe.
After looking at simple frames, you might find that you definitely need something to incorporate all your research and ideas. Here’s a more structured Balsamiq wireframe that has versions for mobile devices like a tablet and mobile phones.
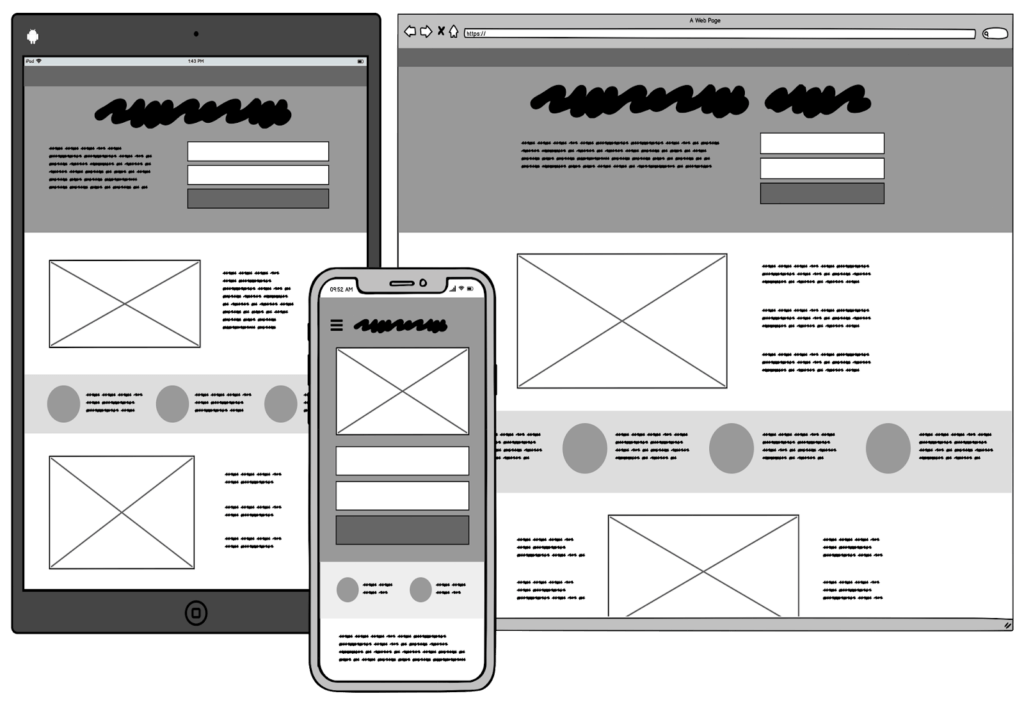
When working on wireframes for multiple devices it can help to think about if the UI design for your mobile apps should change for iOS and Android devices. Some wireframes draw out the entire phone including buttons.
Thinking about the location of a button on the screen in proximity to a button on the phone is vital. When going to tap a submit button, someone might accidentally hit the back button on their phone. The mistake caused them to exit out of a checkout screen right after entering credit card information. This is not the sort of frustration many are not willing to go through to use your product or service.
This mistake could make them rethink going back to purchase the item. Anger and irritation from small issues are big motivators for uninstalling an app so keep that in mind.
Wireframes can be even more detailed than this and you can write out each section and the colors you plan to use. You can also create a thumbnail, which is a detailed sketch of your web application.
Overall, if you want to get more detailed, you can add all the design aspects you want to use in a tool for wireframing like Figma and Adobe XD. One thing to note is your detailed plans may fall through the cracks. When coding you may find something doesn’t interact the way you wanted it to, or the pages load slowly because you got too crazy with content. Make sure you think of a wireframe as a work in progress.
You can also make that process easier by designing a UI kit to then code and integrate into your application. The UI or UX kit is a collection of components like your buttons and favicons.
People that are following a brand guide will benefit from templates of pre-styled buttons they can just plug into a webpage instead of code from scratch. Your website will be uniform and reminds visitors of your brand themes. You can plan the kit in pen or using any wireframe tool.
Wireframe Tools
If you have a team that needs to give input on your design it’s better to use an online tool. If you’re alone, feel free to use a pencil and paper. Students will likely be required to sketch out all ideas on paper, but may not need to use a tool. In general, you will benefit from a rough sketch and a list of ideas, even if the goal is to use a tool.
The top industry tool is Figma, but their competition is just as easy and intuitive to use. Figma has great usability and customization. You can change the colors, images, text, and anything else you want. Figma has a free plan but limits the number of projects.
Figma is not only for wireframing whereas Balsamiq is marketed mainly for UI design.
Balsamiq has the tools to let you get even more in-depth designs and is a great tool for learning wireframing. They do not offer a free version.
Adobe XD is another awesome tool, and students that already have a student Adobe account can use it. XD is great to use for high-fidelity wireframes and user flows. User flows are when you map out the pages users will move from to get to your goal.
A consumer may see a video on Facebook, then follow the call to action to get your site, and from the landing page navigate to the item they will buy. User flows show this process, and Figma and Adobe XD are ideal to map with.
One fun fact is you don’t have to use tools that are the industry standard for wireframing. You can create a wireframe in Microsoft Word by inserting shapes, text, and stock images. You can change and manipulate your shapes with gradients; Word is great for wireframing.
You can also draw digitally with Sketch and Adobe Illustrator, just as you would with pencil but neater and easier to read. Another design tool you can use is Canva, where you can style each interface and then download or share it with others.
Canva is known as a social media tool, but it has all the same elements to create an interface like shapes, text, images, color, and design. Canva has amazing features in their free plan, and are 100% worth a look.
More Resources and Tutorials
There are more resources for you to consider if you haven’t found exactly what you want. If you want a tool like figma, click here to explore its direct competitors. You may want to see a tutorial to get inspired. Below is a walkthrough from sketching to digitizing a wireframe.
Was this helpful?